Will a DIY Drop Ceiling Get You in Over Your Head? Here's What You Need to Know

Installing a Drop Ceiling at a Glance
- Tools & Materials: Main beams, wall molding, cross tees, hanger wire, fasteners, ladder, drill, level, utility knife
- Step 1: Plan the ceiling
- Step 2: Install wall angles
- Step 3: Wire lighting
- Step 4: Install suspension wires
- Step 5: Install main runners
- Step 6: Trim and add tiles or panels
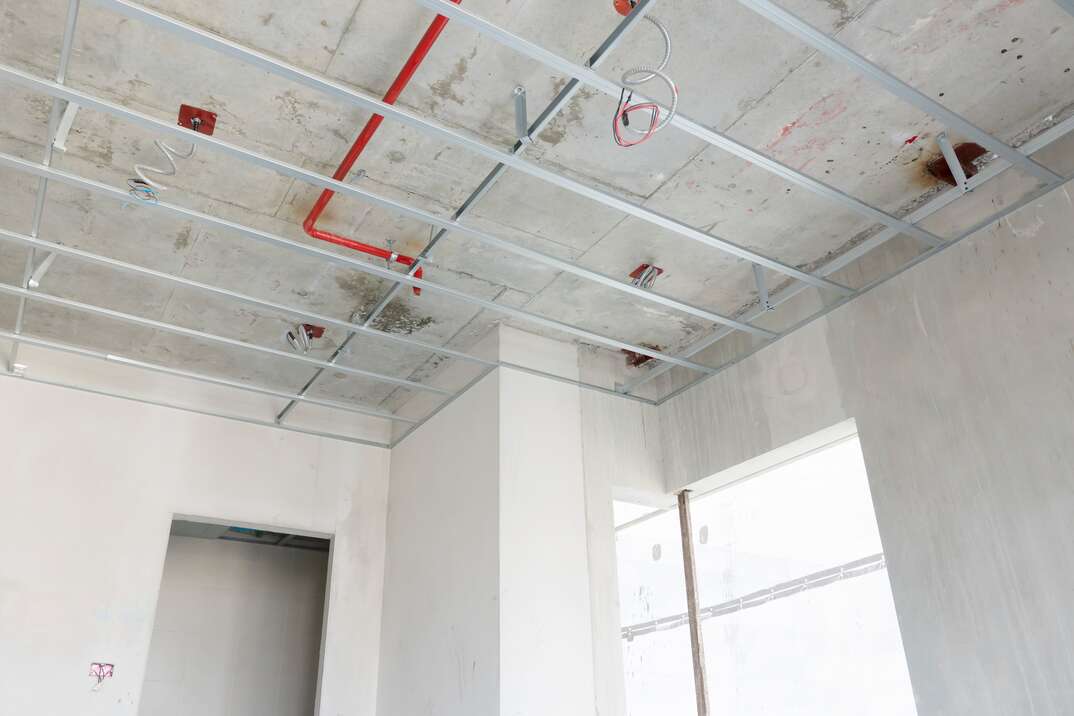
Installing your own drop ceiling can save you big time on your latest home improvement project. A drop ceiling — sometimes called a suspended ceiling — is a great choice for hiding a messy network of wires or pipes, especially if you’re remodeling your basement.
This May Also Interest You: How Much Does a Basement Remodel or Renovation Cost?
Before you go all-in on this DIY project, you should know that installing a drop ceiling is a fairly labor- and time-intensive task that comes with numerous challenges. However, the final result is well worth it. The following installation overview should tell you everything you need to know to install your drop ceiling like a pro.
What Is a Drop Ceiling?
While you probably think of the ceilings in your home as being solid and unchangeable — much like your home’s overall structure — the truth is that a drop ceiling is something else altogether. As Bob Vila puts it, a drop ceiling is more like a screen that’s formed by a metal grid framework. This system holds and supports movable tiles of your choice, ranging from wood-look panels to old-timey tiles made from tin.
Advantages of a Drop Ceiling
If you’re on the fence about installing a drop ceiling, it may be helpful to look at the benefits. A drop ceiling may be a good choice if:
- You are hoping to increase energy efficiency in your room. Because a suspended ceiling lowers the overall height of your room, it also reduces the amount of space that you need to heat and cool. This can directly impact your energy costs.
- Your room could benefit from the illusion of light or space. Depending on your choice of panels or ceiling tiles, you can easily create the impression of a room being larger or more brightly lit than it really is.
- You want to soundproof your room. If you choose soundproofing or acoustic ceiling tiles, you can keep sound from bleeding into other rooms.
- You need to conceal less-than-attractive points in the ceiling that are taking away from the overall look of your room. For example, you might have an unsightly popcorn ceiling that you want to conceal from view.
- You want to hide structural components in the room. You might also want to hide cables and pipe ducts but also maintain access to these components for repair or maintenance needs. With a drop ceiling, you can just lift the tiles or panels up and slide them to the side to make necessary repairs and then replace the tiles or panels once you’re done.
- Your room needs a new look. Ceiling tiles and panels come in designs aplenty these days — far beyond the basic vanilla, commercial look of yesteryear’s options. You can find them in colors, materials and designs that mesh nicely with your room's vibe to make your ceiling a true showpiece in your space.
Drop Ceiling Cons
There are some drawbacks associated with suspended or drop ceilings. For starters, drop ceilings deteriorate more quickly than other types of ceilings, such as drywall ceilings. Leaks tend to stain them easily, necessitating the replacement of affected tiles. Over time, tiles and panels tend to take on a droopy, sagging look that can really age your room beyond its years.
In addition, drop ceilings reduce a room’s height. If you have a room with 9-foot ceilings, a drop ceiling may cut the height down to just 7 feet instead.
Is Installing a Drop Ceiling Difficult?
"Difficult" is subjective. Installing a drop ceiling is harder than a lot of projects one might consider “DIY.” Purchasing a drop ceiling kit and reading the manufacturer’s instructions can make it easier to pull off. As with most projects, it always helps to have a partner along for the ride. They can help you hang the necessary components of your drop ceiling. Remember to allow yourself plenty of time and a heaping helping of patience for a big job like this one. Weigh the time spent on the project against the cost of hiring a pro for the job.
Can You DIY a Dropped Ceiling?
As you can see, dropped ceiling installation can be quite complex. It certainly isn’t a job for a beginning DIYer. Even those with tons of project experience under their belts may find installing a dropped ceiling to be a challenge at best. If you are handy with the tools required for the job — especially cutting and measuring implements — and you have a buddy or two to help out, the project may be within your reach. If you’re limited on time, or if you lack solid carpentry skills, a dropped ceiling may be one job that you should leave to the professionals. A suspended or drop ceiling also requires proper installation to ensure that the ceiling meets industry standards.
Start With a Sketch
When installing a drop ceiling, it’s helpful to begin by sketching the area of the installation on graph paper. Make note of where ceiling fixtures are located. Sketch several arrangements until you can come up with one that will allow the widest possible ceiling tiles to go around the edge of your room.
Supplies You’ll Need
The supplies needed for a DIY drop ceiling installation can be purchased by a la carte, or you can buy a drop ceiling kit. Drop ceiling kits make the whole process easier for DIYers because they include everything needed to install the ceiling, minus the guesswork that might come along with planning a project on their own. This can be useful for obvious reasons, plus kits may be cheaper than the cost of buying everything separately.
Most kits will include these items if you decide to go that route. If you decide to buy individual items for your drop ceiling installation, you’ll need the following:
- Main beams: These are panel supports, and their job is to span the distance between walls. They run perpendicular to the ceiling’s joists.
- Wall molding or angles: Necessary for supporting the tiles or panels on one edge, these are L-shaped metal wall molding strips that run along the perimeter of the ceiling.
- Cross tees: Like main beams, cross tees are also panel supports. They are meant to be installed between the grid’s main beams and parallel to the joists.
- Hanger wire and fasteners: These hardware essentials tie the grid’s main beams to the joists in the ceiling.
You’ll also need a step ladder to access the ceiling to complete the installation. Other necessary items include a cordless drill, a level and a utility knife. Also, don’t forego a pair of safety goggles because the process of cutting the tiles to fit can create lots of debris.
Step-by-Step Drop Ceiling Installation
Although the exact process may vary depending on your specific room and the supplies you choose, the installation process generally goes as follows:
Step 1: Plan Your Ceiling
Plan a pattern for the ceiling. According to DIY Network, these patterns can be 2-foot by 2-foot squares or 2-foot by 4-foot rectangles, depending on the tiles or panels you choose. The pattern you select can also determine the materials needed. As a general rule, with the 2-foot by 4-foot pattern, you need to space your 4-foot cross tees exactly 2 feet from one another. With a 2-foot by 2-foot pattern, you can do the same thing, then add 2-foot cross tees between the 4-foot cross tees’ midpoints.
Clearly indicate on your sketch the panel location for built-in lighting. Allow proper clearance if you're installing recessed lighting.
Step 2: Install the Wall Angles
Once you have determined the exact position for your drop ceiling, use a level to mark a line around the perimeter of your room to indicate where the wall angles will be installed. When marking this line, remember that you shouldn’t assume the ceiling is level, so don’t base the line you draw on the existing ceiling. Securely fasten wall angles at all necessary points, using screw anchors, masonry fasteners or nails. Miter the corners.
Step 3: Install the Wiring for the Lighting
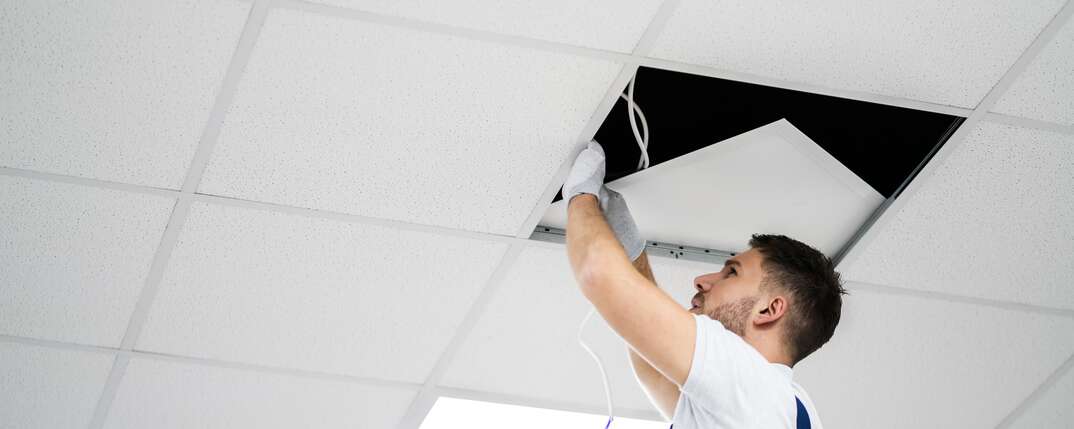
If you are adding recessed lighting, place the wiring prior to hanging your ceiling’s suspension wires. There are special drop-in lighting fixtures that are made specifically for dropped ceilings. Some fluorescent lights center over the panels, or you can find whole light-up panels for easy installation. Planning on installing a ceiling fan? Place those wires, too.
Step 4: Install the Suspension Wires
Locate the main tees, which should run at right angles to the room’s joists. Stretch a tight line from the wall angles on all sides of the room where you are going to place the main tees. Cut the suspension wires to the length necessary. DIY Network recommends cutting the suspension wires to the necessary length, plus 12 inches. Fasten the suspension wires into position. You will need one suspension wire every 4 feet. Be sure to stretch the suspension wires to remove kinks.
Step 5: Install the Main Runners
Using your sketch as a reference, measure the distance from the main tee’s top flange to the slot just beyond. Then, measure the same distance back, but subtract 1/8 inch. Saw the main tee at this location. Install the main tees, ensuring that they are level with the installed wall angles. Check for levelness, then install the cross tees, inserting their ends into the main tee’s slots. Follow the manufacturer’s instructions for a proper fit. Now, you should have a gridwork on which you can install the tiles or panels.
Step 6: Trim and Add the Tiles or Panels
Most rooms will need some tiles that are not full size. For those areas, measure the opening in the grid, and add 3/8 inch to your measurement. Using a utility knife, trim any edge tiles down as needed.
The easiest part of the entire process is adding your ceiling panels or tiles. Lift them just above the framework of the ceiling, tilt them a bit and drop them into place. Be sure that your tiles are level as you drop them in. If you notice that one is not level, you need to adjust the runners on the grid prior to adding additional tiles.
More Related Articles:
- 5 Finished Basement Ideas for Your Home
- Tips For Cooling or Heating Your Basement
- How to Wire a Ceiling Fan
- How Much Does It Cost to Install Recessed Lighting?
- How Much Does Drywall Cost?
How Much Clearance Is Needed for a Drop Ceiling?
You must allow a minimum of 4 inches clearance between the drop ceiling and the old, existing ceiling. Plan on additional clearance if your room has or will have recessed lighting.
How Do You Make a Drop Ceiling Look Good?
The available selection of drop ceiling tiles and panels nearly ensures homeowners can find something they love. Select tiles or panels with a material or design that goes with your décor, or paint your ceiling tiles before or after installation for a custom look.
Does a Drop Ceiling Reduce Noise?
By design, drop ceilings offer built-in decoupling, which is the necessary component of adequate and effective soundproofing for any space. For sound to move between levels of your home, vibrations must be able to find their way through your ceiling. If there is a physical route for these vibrations to take, it makes it easier for folks above you to hear what’s going on below them. The design of the drop ceiling, with its suspended panels installed on a dropped-down grid, disrupts that pathway, effectively reducing vibrations and sound.
A drop ceiling can help reduce noise levels even further if you install special tiles or panels that are rated for noise reduction. The soundproofing capacity of ceiling tiles is determined by two different ratings. The first is the noise reduction coefficient (NRC), a measurement that runs from 0 to 1 as an indicator of the amount of sound absorbed by the tile. A tile with an NRC of 0 reflects all sounds back into the room, while a rating of 1 absorbs all sounds.
Similarly, the ceiling attenuation class (CAC) rating also measures the soundproofing abilities of ceiling tiles. CAC measures how well the tile keeps sound from transmitting through it. This is especially useful for applications where you wish to prevent noise from rising from the basement to the next story of a home. For the best performance, choose ceiling tiles with CAC ratings of 35 or more.
Is It Cheaper to Drywall or Install a Drop Ceiling?
Drywall ceilings are quite affordable. According to ImproveNet, most average drywall ceiling constructions cost $1.50 to $3 per square foot. The materials for a 140-square-foot ceiling cost about $250, plus the cost of installation. Labor costs are also generally low.
Drop ceilings cost between $1 and $2 per square foot. Because drop ceiling installation is easier than drywall ceiling installation, the cost of labor is also generally less than hiring someone to put up a drywall ceiling.
An Alternative to the Drop Ceiling
If the suspended or drop ceiling seems like a lot of work, there is an alternative — especially for rooms where you don’t need to hide ductwork, pipes or cables. Direct-to-ceiling tiles can be installed without the grid, using clips and tacks, screws or adhesives. This type of ceiling can be just as beautiful as a drop ceiling without all the elbow grease of placing the drop-in framework.
Drop ceilings are not always the prettiest choice, but they do satisfy the need for a quick, affordable option that many homeowners can install on their own with minimal problems. They provide an easy disguise for rooms with overhead ugliness, giving your space a friendly, inviting ambiance.


