How to Tile a Floor: A 6-Step Installation Guide
Installing a Tile Floor at a Glance
- Tools and materials: Level, notched trowel, spacers, rubber mallet, grout float, manual tile cutter or handheld tile nippers or electric wet saw
- Step 1: Lay backer board
- Step 2: Practice tile layout
- Step 3: Apply mortar or mastic
- Step 4: Lay tile
- Step 5: Apply grout
- Step 6: Seal grout
A tile floor is one of life’s true pleasures. In the kitchen, bathroom or other areas of your home, the cool surface is simply a joy underfoot, especially during the hot summer months. With the seemingly endless variety of colors and patterns, tile has the ability to transform the look and feel of a room instantly.
This May Also Interest You: How to Remove a Tile Floor
Tile floors can look polished and sophisticated. They’re also easy to clean and maintain, and they don’t hold onto dust or dirt like their vinyl counterparts. Lucky for you, tile is also a relatively easy project that can be accomplished by the novice DIYer. So, what are you waiting for? Follow the step-by-step installation guide below.
Tools and Materials
If you haven’t already, now’s the time to decide what type of tile you’d like for your flooring. Tile comes in materials ranging from glass to marble to natural stone and more. The most common type of tile found in homes is ceramic. It’s versatile, affordable and can handle lots of foot traffic. Regardless of what type of tile you choose, most are installed the same way.
To properly install tile, you’ll need a level, a notched tile trowel, tile spacers, a rubber mallet and a grout float. You’ll also need some way to cut the tiles. You have the option to use a manual tile cutter, handheld tile nippers or an electric wet saw. While each tool has its benefits, a wet saw is probably the most efficient and accurate tool to use, especially if you have a lot of cuts to make. Wet saws are usually pretty expensive, but you can rent one from your local hardware store for around $20 a day.
Step 1: Prep the Floor
Before you start laying tile, you’ll first need to first install a type of cement backer board substrate on top of your subfloor for the tile to adhere to. You can install the cement backer board directly on top of the wood subfloor. Just make sure that the subfloor is not loose or damaged prior to installation. Be sure to lay the board down in a “brickwork” pattern. In other words, don’t let any four corners meet and don’t let backer board joints lay on top of subfloor joints.
Once you’ve done a dry run to practice your layout, lift and remove the backboard sheets from the subfloor and apply thin-set mortar on top of the wood subfloor. Even though thin-set mortar dries slowly, only apply enough mortar for one sheet at a time. Use the smooth edge of your notched trowel to spread the mortar, then texture it with the notched edge of tile once it’s spread.
Place the sheet of backer board down and repeat until all the sheets have been put in place on top of the subfloor. Be sure to leave an approximately ⅛-inch gap between each backer board sheet and a ¼-inch gap between the boards and the wall. When the boards have been set into the mortar, drill screws into the board every 8 inches, securing it to the subfloor. Don’t drill the screws in too far — just slightly below the surface. Drill too far and the boards may crack and break.
Step 2: Create a Layout
Once the backer board has been installed and the mortar has had at least 24 hours to dry, create a layout on the floor for the tile. First, you’ll need to find the center of the room. Start by measuring the room in one direction and locate and mark the halfway point. Measure the room in the opposite direction and mark the halfway point there. Then, use a chalk line reel to snap chalk lines across both markings. Where the lines intersect is the center of the room.
Start laying tiles on the floor beginning at the center, following both chalk lines. Don’t mortar anything yet. Have your tile spacers ready and place them between the tiles to make sure the distance is consistent throughout. Lay enough tiles to reach the walls in both directions, stopping when there is not enough room for a full tile. If the remaining space is smaller than a third of a piece of tile, readjust the spacing in your row of tile so at least a half of a tile can fit. While this is just a recommendation, small pieces of tile near walls may not bond as well to the backer board. Plus, little pieces of tile don’t always look great in terms of your design. Depending on how confident you are with your layout, you may want to save your cuts until you are actually setting the tile into the mortar. Dry runs are great for determining your layout, but it all might look a little different once the mortar is spread.
Step 3: Mortar or Mastic?
Most tile manufacturers recommend a specific type of adhesive to use with their product. Typically this is either thin-set mortar or a liquid adhesive like mastic. It’s always a safe bet to go with what the manufacturer recommends, but it’s also important to consider where the tile is going and what conditions might be present during its lifetime. In general, adhesives like mastic have a tendency to harbor mold if moisture is present. Under extremely wet conditions, they can even re-liquefy and lose all adhesive strength. We’ll let you make the call here, but it’s important to understand the potential risks before investing in any product.
If you’re using mortar, we recommend purchasing a premixed thin-set mortar product, even though it’s the more expensive option. Let's face it: Mixing mortar just isn't fun. It’s messy, and it can also be tricky to figure out the water-to-mortar ratio. If you have to purchase the old-fashioned, mix-it-yourself mortar, carefully follow the manufacturer's instructions on the packaging.
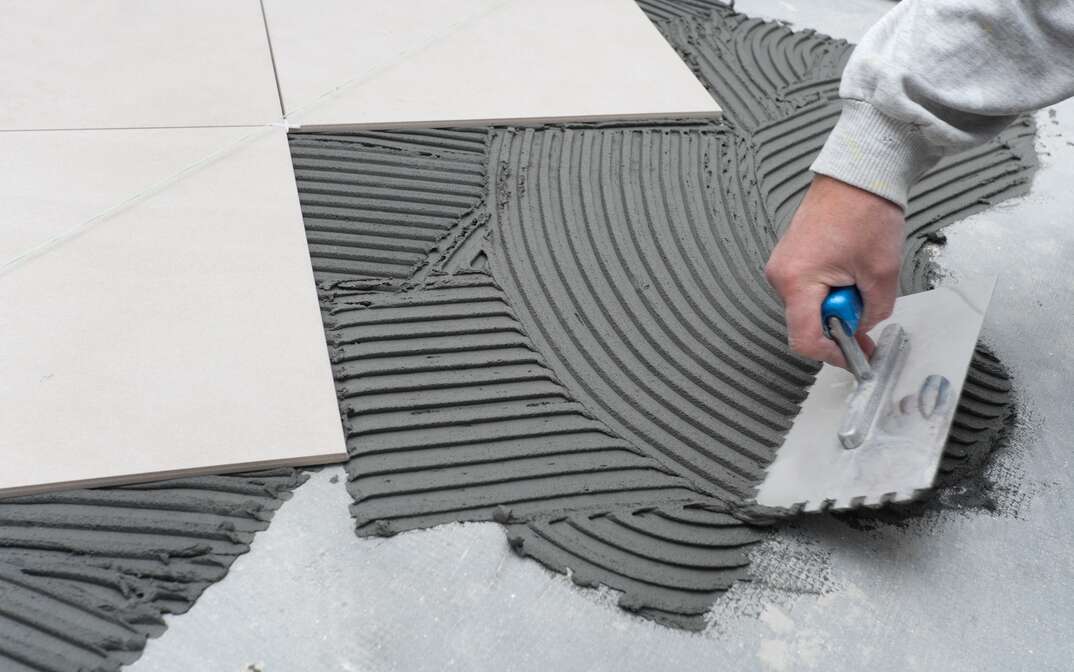
To apply the mortar, use a notched tile trowel. Each tile manufacturer recommends a specific size trowel for their tile, so be sure to double-check this before you run out to buy your supplies. In general, the smaller your tile, the smaller your notches. Larger tiles need larger notches.
Starting at the chalk lines, press and spread the mortar against the backer board using the same method you used to mortar the backer board. Start by spreading the mortar onto the surface of the backer board using the smooth side of the trowel. Then, once it’s been spread, use the notched side to texture the surface. Only spread about 3 to 4 square feet at a time to prevent the compound from drying before you get a chance to lay down all the tile. This is especially important as you near areas where cuts are necessary; sometimes cutting takes time, and you want to make sure all the tiles are bonded properly.
Lay the center tile first. Once you place it securely in the mortar, pull it back up to make sure the mortar is evenly spread across the back of the tile. If you see bare spots, apply more mortar, then reinstall the tile. If you see mortar coming up between your tiles, you’re using too much. Do your best to scrape some of the mortar off the surface, then reinstall.
More Related Articles:
- How Much Does It Cost to Remove a Tile Floor?
- Get the Grout Out: How to Remove Grout From Tile
- How Much Does It Cost to Install a Tile Shower?
- Tale of the Tile: An Overview of Bathroom Tile Flooring
- How Much Does It Cost to Install or Replace Tile?
Step 4: Lay the Tile
Beginning from the center, set tiles out toward the walls. Keep in mind that you won’t want to step or place any weight on the tiles as you work, so always make a space to sit on the untiled portion of the floor.
As you install the tiles, use a rubber mallet to gently tap on the tiles to level them and embed them more firmly into the mortar. As you work, be sure to continue to double-check the spacing and alignment of the tiles. Spacers help, but they aren’t foolproof. Tiles tend to move and shift as mortar starts to harden. Keep an eye on this as you work, as you might need to readjust. As you near the walls or other objects that will require you to cut tile, be sure to measure twice before cutting. Use your weapon of choice here for making cuts. Manual tile cutters can work well for limited cutting with ceramic tile. If you have a lot of cuts to make — or if you’re using natural stone or porcelain tile — you should always use a wet saw.
Step 5: Apply Grout
Once you’ve installed your tile, allow the mortar to dry for at least 24 hours. Then, apply grout to fill in the spaces between the tiles. Grout comes in various colors and hues; find one that compliments the tile you’ve installed. Again, we recommend using a premixed grout option. Like mortar, grout can be a pain to mix properly.
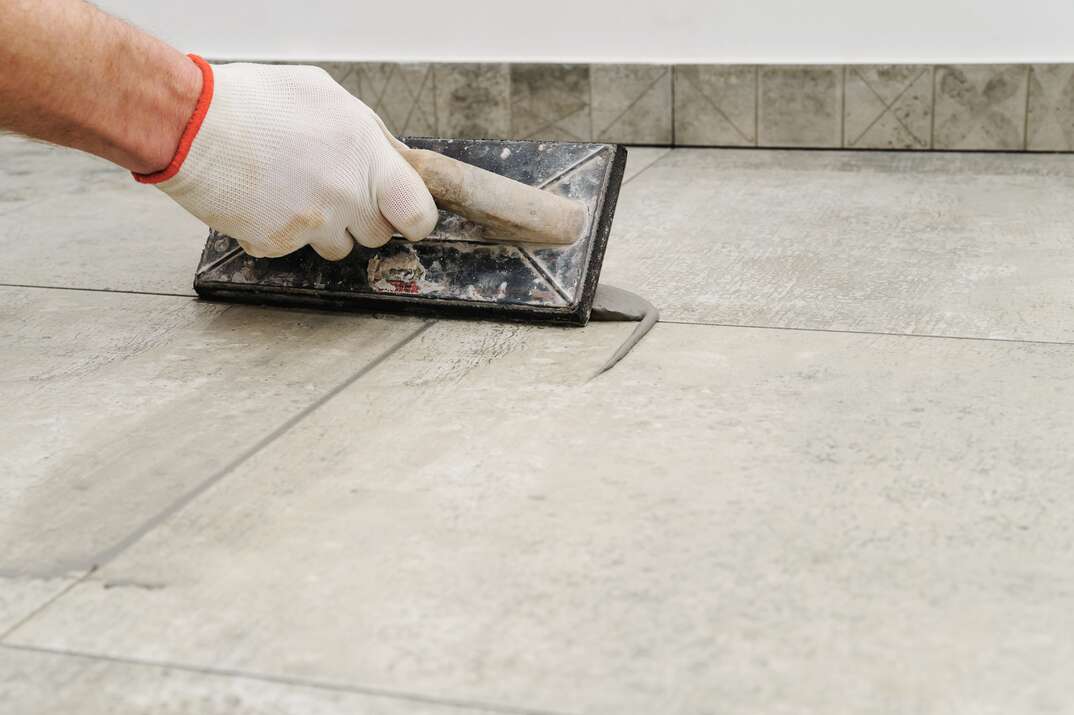
Use a rubber grout float and spread the grout across the tile. Hold the grout float at a shallow angle. That’ll prevent the grout from pressing into the tile joints too firmly, which will create uneven grout lines. Once the grout has been spread, remove excess grout from the surface of the tile by scraping it with the grout float held at an approximately 45-degree angle.
Wipe the grout haze off of the surface of the tile with a wet tile sponge. Wring out the sponge often and make sure it stays clean. The cleaner the sponge, the better it will clean the surface of the tile. Once the tile has been cleaned, let the grout dry and cure – which, depending on the type of grout you use, might take anywhere between 24 and 72 hours.
Step 6: Seal and Enjoy
When the grout has had time to dry and cure, it’s important that you apply a grout sealer to keep the grout lines looking clean and fresh. Grout sealer is an invisible protectant that can keep your grout from staining with the likes of dirt, mold, and mildew. Follow the instructions on the packaging for the best application methods. Some sealers come with their own applicators, while others require you to purchase a separate tool to apply.
Then, you’re done. Tiling a floor really is as simple as it sounds. While it does require some pre-planning and patience, it’s well worth it in the end.
While a tiling project can be a creative and fun endeavor, not all home repair projects follow suit. That's why it’s important to be prepared with a home repair plan from HomeServe. Once you have a plan in place and a covered issue arises, you can simply call our 24/7 repair hotline. Find out what plans are available in your area.
